I first became interested in bread and bread making in the Fall of 2019. You see, I had always liked to cook, but the baking side of things never really took hold with me. It wasn’t until I returned home from a trip to Ireland that I began to see what all the fuss was about. While there, we were introduced to an incredible Rustic Potato Bread at Aniar restaurant in Galway, Ireland, as well as to an 8-year old sourdough starter named “Hugo” at Ox restaurant in Belfast.
So, upon returning to Canada I began to study up a bit and delve into the mysterious world of bread making, and in particular – creating my own sourdough starter. I began in the usual places (Google, cookbooks, etc.) and then started to look at what other cooks were doing on Pinterest and other social media sites. In the process – and through some valuable trial and error – I learned some very important things:
- You can’t rush bread and you can’t cut corners. Like bread, a sourdough starter might take some time to perfect.
- Only use unbleached all-purpose flour for your starter.
- Don’t not use water that has been chlorinated for your starter. Water must be filtered or distilled in order to get the right results.
- You can test whether your starter is ready by placing a small amount in a bowl of water. If it floats, it’s ready for use.
- If you make your own sourdough starter, you must give it a name.
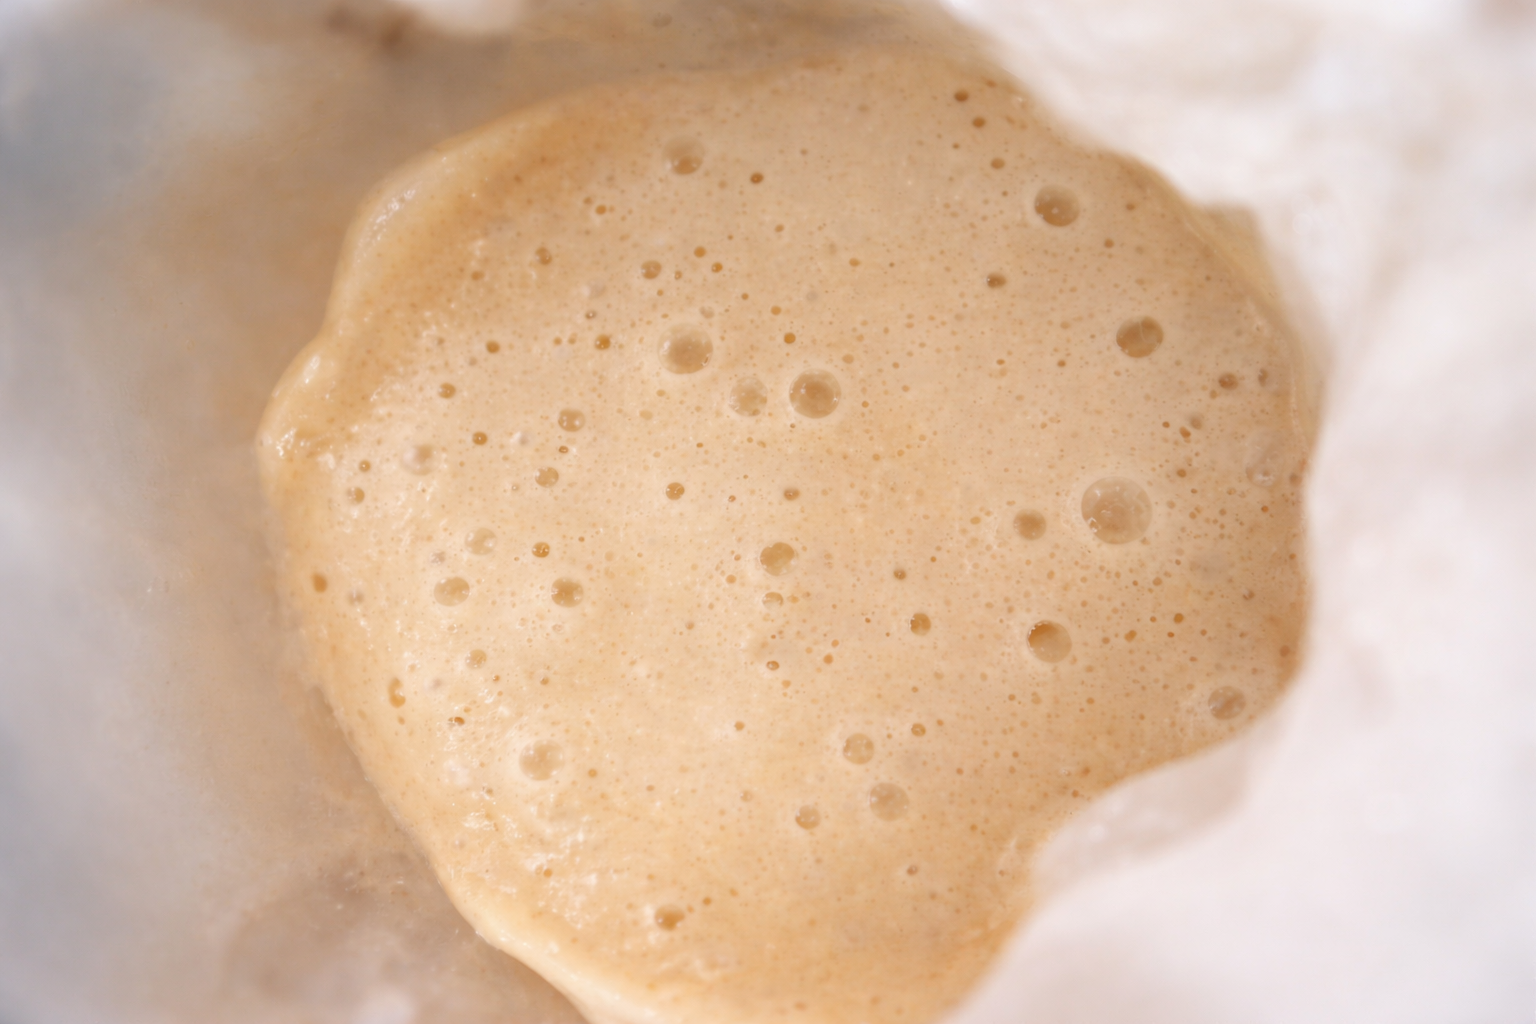
My Sourdough Starter
Armed with all of this valuable new information I then set out to create my own. In keeping with tradition, I turned to my family for options for an appropriate name for the starter. After much debate (and several laughs) we finally landed on “Jolene“. I think this had something to do with listening to too much of the Miley Cyrus version of the famous Dolly Parton song over the summer, but I can’t be certain. Anyway, the experimentation (and fermentation) began, and in mid-November 2019, Jolene was born.

Defined as a “fresh yeast” (as opposed to the active or instant yeast you get in a store), the process of creating your own sourdough starter takes only five days and is actually pretty straightforward. Here are the steps:
- Day 1 – Add 2/3 cups flour and 1/3 cup fluoride-free water (approximately a 50/50 mixture by weight) in a non-metallic container and mix well to combine. I’ve used a large jar which can easily be sealed for later storage. Cover with a tea towel and let sit at room temperature overnight.
- Day 2 – As early as the next morning the fermentation process will have started and you may begin to see bubbles in your starter. “Feed” your starter by adding another 2/3 cups flour and 1/3 cup fluoride-free water to the container. Mix well to combine, scraping down the sides of the container as you do. Cover and let sit at room temperature for another 24 hours.
- Day 3 – By day three, bubbles should be noticeable on the surface of your starter. Begin by ensuring that no mold has formed on your starter. If it has, throw it out and start again. If everything is looking good, add another 2/3 cups flour and 1/3 cup fluoride-free water and mix well to combine. Cover and let sit at room temperature overnight.
- Day 4 – You should really start to see changes by day four. More importantly, the starter should have grown significantly in size and should have begun to smell slightly “sour”. Check for signs of mold and add a final 2/3 cups of flour, with a splash of fluoride-free water. Mix well to combine. Cover and let sit at room temperature overnight.
- Day 5 – Your starter should have at least doubled in size and should have an obvious yeast smell. At this point it’s ready to be used in a recipe!
People have long debated the addition of plain Greek yogurt to the starter in order to expedite the fermentation process. Many feel that this constitutes “cheating” because it will artificially add a sour flavour. Although the addition of yogurt will reduce the overall pH level – thereby reducing the possibility of bad bacteria and mold – it does not assist the fermentation process in any way. I’ve gone with the more traditional method here.
Storing and Maintaining
If treated correctly your starter can last for years, and will only get better as it ages. They say that no two starters are alike and that they actually begin to take on the properties of their immediate environment – your home. As a result, each sourdough in the world will have a unique taste that will develop over time. Relatively speaking, Jolene is only a newborn who will take on new qualities as she “matures”.
Although it’s perfectly fine to store your sourdough starter at room temperature, it must be fed daily with small amounts of flour and water to prevent the yeasts from dying. To do this simply add a few tablespoons of flour and a splash of water. Mix well and re-cover the starter. Repeat daily and you can use your starter to make bread every few days.


However, considering that not all of us are professional bakers pushing out artisan bread loaves on a regular basis, it’s essential to understand the proper way to store and preserve your starter if you’re not going to use it regularly. If that’s the case, when you’ve finished with your sourdough start simply seal it up and place it in the fridge (shorter periods between use) or freezer (longer periods). This will cause the starter to become dormant, but the yeast will survive. And the best part is that your dormant starter will not require feeding.
Then when you’re ready to use it again, remove it from the fridge or freezer a day before use, allow it to thaw, and feed it with a small amount to flour and a few drops of water. You’ll be amazed at how they will spring back to life.
Some Sourdough Recipes
Now that you’ve created your sourdough starter there are endless possibilities for what to do with it. When using your starter you will definitely note that your breads will have a much more complex flavour and will offer a slightly sour note. In the end, these recipes will provide an interesting twist on some everyday favourites, including:
- Honey + Sourdough Cinnamon Rolls
- Sourdough English Muffins
- Classic Sourdough Bread
- Sourdough Blueberry Scones
- Sourdough Crusty Rolls
Best of luck with your sourdough starters! In the words of Thomas H. Palmer “if at first you don’t succeed, try, try again“.